Essential Supplies You Need Before Painting Your Home Exterior
Reading time: 12 minutes
So you’ve decided to repaint your home’s exterior — great call. A fresh coat of paint doesn’t just boost curb appeal; it actively protects your home from moisture, UV damage, and structural wear. But here’s the thing most weekend warriors discover too late: the difference between a paint job that looks stunning for a decade and one that’s peeling within two years isn’t the paint itself — it’s the preparation and the supplies you gather before the first brushstroke.
In 2026, with material costs still elevated from supply chain adjustments and the average exterior painting project running between $3,800 and $7,500 for a standard two-story home, the stakes of getting it right the first time are higher than ever. This guide cuts through the noise and gives you the exact supply roadmap you need.
Table of Contents
- Why Preparation Is 70% of the Job
- Surface Preparation Tools
- Choosing the Right Primers and Paints
- Application Equipment
- Safety Gear You Cannot Skip
- Supply Comparison: DIY vs. Professional Grade
- Which Exterior Paint Types Last Longest?
- 3 Common Challenges and How to Overcome Them
- Frequently Asked Questions
- Your Exterior Paint Project Roadmap
Why Preparation Is 70% of the Job
Here’s the straight talk: professional painters will tell you that at least 70% of a successful exterior paint job is prep work. The other 30%? That’s the actual painting. Yet most DIYers spend 90% of their mental energy obsessing over color swatches and glossiness levels while underinvesting in the tools that make paint stick, look even, and last.
Consider this real-world scenario: In 2025, a homeowner in Phoenix, Arizona invested $4,200 in premium exterior paint for their stucco home but skipped pressure washing and proper crack sealing. By mid-2026, the paint was visibly bubbling in three sections due to moisture trapped beneath improperly cleaned surfaces. A neighbor on the same street spent $1,900 less on paint but invested in thorough prep supplies — their home still looks freshly painted. Prep wins every time.
“We see it constantly — homeowners spend $500 on top-tier paint and $12 on a roller. The investment calculus is completely backwards.” — Marcus Delgado, Master Painter and founder of Delgado Exterior Solutions, speaking at the National Painting Contractors Expo in 2025
With that mindset firmly in place, let’s build your supply list from the ground up.
Surface Preparation Tools
Surface preparation is where your project is won or lost. This category of supplies is the most diverse and, frankly, the most commonly underestimated. Here’s what you genuinely need:
Pressure Washer and Cleaning Solutions
A pressure washer is non-negotiable for exterior painting prep. You’re dealing with years of accumulated dirt, mildew, algae, bird droppings, and oxidized old paint. A quality electric pressure washer rated between 1,500 and 2,000 PSI handles most residential siding materials safely. For brick or concrete, you can push to 2,500 PSI, but be cautious with wood and vinyl — too much pressure causes surface damage.
In 2026, the Sun Joe SPX3001 and the Greenworks GPW1950 remain strong mid-range options in the $180–$240 range. If you’re buying for a one-time use, rentals from Home Depot or Lowe’s run about $75–$95 per day.
Cleaning solutions you’ll need alongside your pressure washer:
- Trisodium Phosphate (TSP) substitute — for general cleaning and degreasing. TSP alternatives are now standard in most states due to environmental regulations.
- Mildewcide cleaner — essential if your exterior has any green or black mold spotting. Zinsser’s Jomax and Wet & Forget Outdoor are proven performers in 2026.
- White vinegar solution (1:1 with water) — an affordable, eco-friendly pre-treat for mild mildew.
Scraping, Sanding, and Patching Supplies
Once the surface is clean and dry (allow 48–72 hours minimum in moderate humidity), you enter the mechanical prep phase. This is where many DIYers underestimate the time and tool investment required.
Scraping tools:
- A 5-in-1 painter’s tool — arguably the single most versatile tool in any painter’s kit. It scrapes, spreads, gouges, cleans rollers, and opens paint cans.
- Pull scraper with carbide blades — for removing thick, failing paint from wood surfaces. Hyde Tools and Red Devil both offer excellent options under $35.
- Oscillating multi-tool with scraper attachment — for getting into corners and detailed trim work.
Sanding supplies:
- Random orbital sander with 60–80 grit sandpaper for smoothing rough edges and feathering old paint transitions
- Sanding sponges in medium and fine grit for hand-sanding curved or detailed sections
- Pole sander for reaching upper sections of flat siding without ladders at every step
Patching and caulking materials:
- Exterior-grade wood filler (Minwax High Performance Wood Filler is a top pick in 2026) for repairing rot damage, nail holes, and gouges
- Paintable elastomeric caulk — not regular caulk — for sealing gaps around windows, doors, trim, and where dissimilar materials meet. Elastomeric caulk flexes with temperature changes without cracking.
- Masonry crack filler if you’re painting brick, concrete block, or stucco
- A quality caulk gun — the dripless style reduces waste and mess significantly
Choosing the Right Primers and Paints
Paint and primer selection can be genuinely overwhelming in 2026, with hundreds of products on the market. Here’s how to cut through the confusion with precision.
Why Primer Is Not Optional
Some paint labels claim “paint + primer in one,” which works reasonably well for repainting in similar colors over sound, previously painted surfaces. But for raw wood, heavily patched areas, stain-prone surfaces, or major color changes (especially going light over dark), a dedicated primer coat is irreplaceable.
Primer types by substrate:
- Oil-based primer — the gold standard for bare or weathered wood. Penetrates deeply, seals tannins (which cause bleed-through), and provides exceptional adhesion. Sherwin-Williams’ ProBlock Oil-Based Primer remains a professional favorite.
- Latex bonding primer — for previously painted surfaces in good condition, concrete, and masonry. Faster drying and easier cleanup.
- Stain-blocking primer — essential if you’re painting over water stains, smoke damage, or natural wood tannins from cedar or redwood.
Selecting Your Exterior Topcoat
As of 2026, 100% acrylic latex paints dominate the premium exterior market for good reason: superior color retention, flexibility, moisture resistance, and easy cleanup. For most residential exteriors, look for paints with these characteristics:
- Minimum 50% volume solids for good hiding and durability
- Built-in mildewcide additives
- UV-resistant pigments — especially important in sun-belt states
- Self-priming capability only for maintenance repaints, not fresh or heavily prepped surfaces
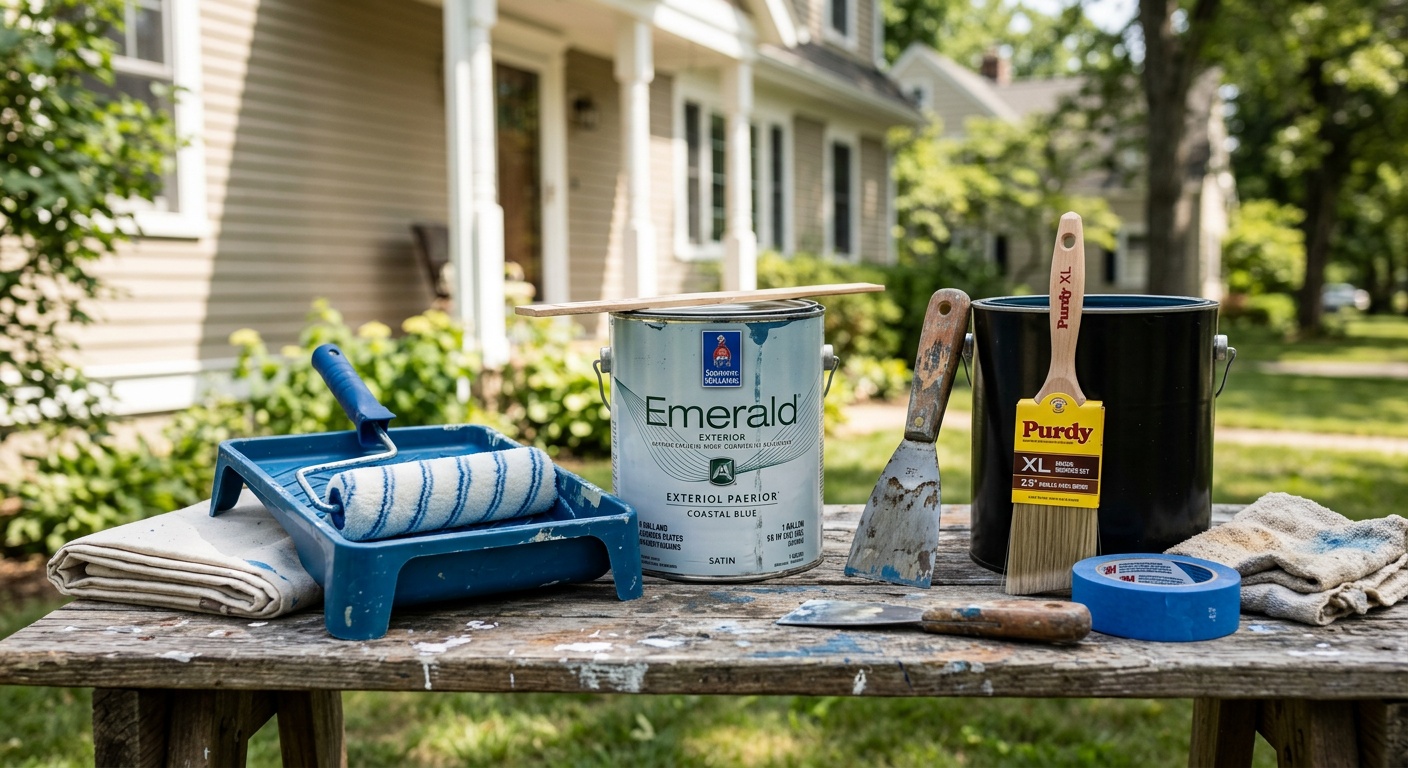
Top-performing exterior paints in 2026 include Sherwin-Williams Emerald Exterior (approximately $98/gallon), Benjamin Moore Aura Exterior (approximately $93/gallon), and the more budget-conscious PPG Diamond Exterior (approximately $65/gallon). Budget realistically: a 2,000 sq ft home typically requires 12–18 gallons of finish coat plus primer.
Application Equipment
The right application tools directly impact your finish quality and project timeline. Here’s what to assemble before you start:
Brushes:
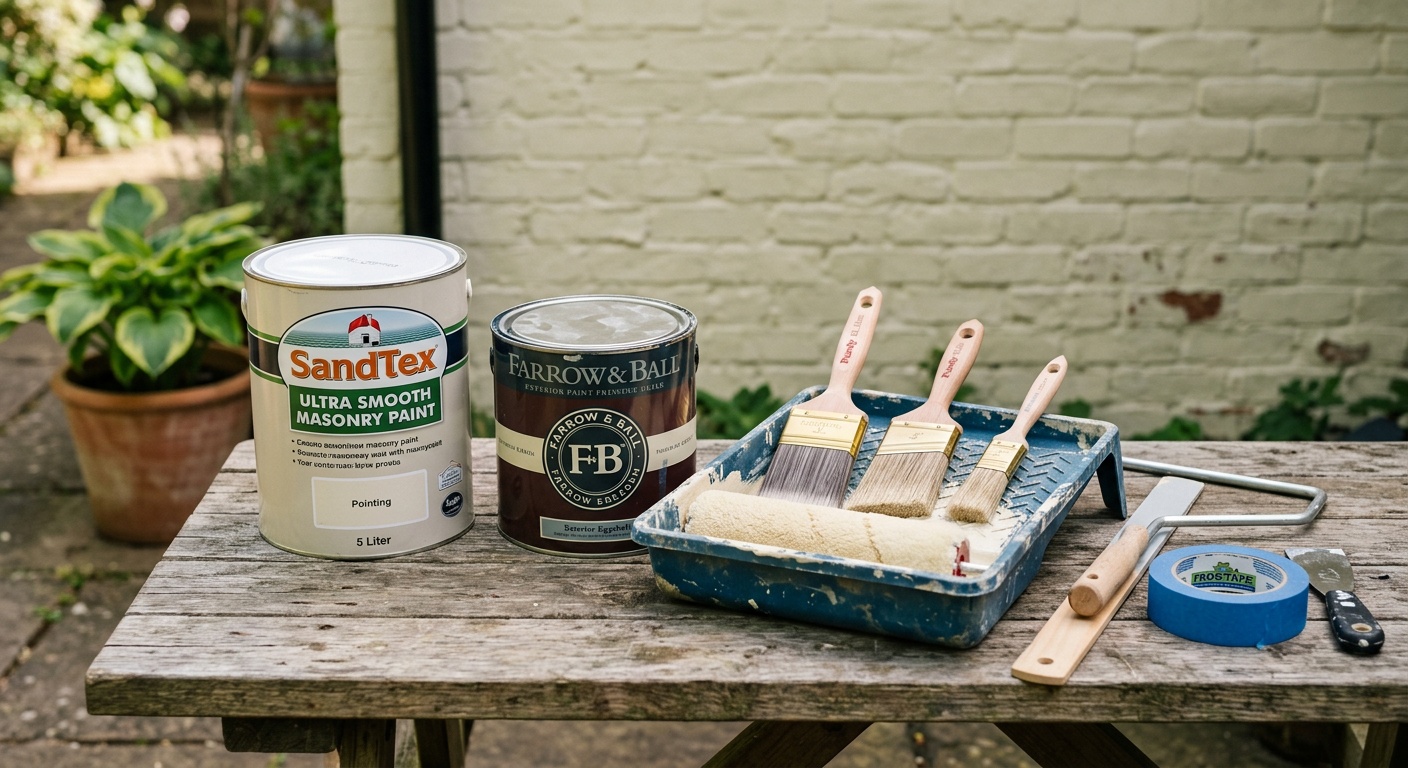
- A 4-inch angled sash brush for cutting in around trim, windows, and doors — invest in quality here (Purdy or Wooster XL brushes, $18–$28)
- A 2.5-inch angled brush for detailed trim and narrow boards
- Look for brushes with nylon/polyester bristles for latex paints; natural bristles for oil-based products
Rollers:
- 9-inch roller frame with extension pole (adjustable 4–8 foot poles cover most two-story work from the ground)
- 3/8-inch nap roller covers for smooth to medium surfaces (vinyl, smooth stucco, fiber cement)
- 3/4-inch nap roller covers for rough textures (rough stucco, brick, split-face block)
- Buy more covers than you think you need — they degrade during use and a fresh cover dramatically improves finish quality
Airless paint sprayer (optional but transformative):
For larger homes or homes with lots of detail work, an airless sprayer cuts application time by 60–70%. In 2026, the Graco Magnum X5 ($330–$380) is the benchmark entry-level professional sprayer that handles exterior latex with ease. Important caveat: sprayers require extensive masking/covering of surfaces you don’t want painted, and there’s a learning curve. If you haven’t sprayed before, practice on scrap surfaces first.
Masking and covering supplies:
- High-quality painter’s tape (3M’s ScotchBlue Platinum is worth the premium price for clean lines)
- Canvas drop cloths for ground cover — plastic is cheaper but slippery and doesn’t absorb drips
- Plastic sheeting for protecting landscaping, windows, and fixtures
- Pre-taped masking film — this game-changer rolls out plastic film attached to tape simultaneously, dramatically speeding up masking
Safety Gear You Cannot Skip
Exterior painting involves ladders, chemical exposure, and repetitive physical stress. This is genuinely a category where cutting corners creates real risk.
- Extension ladder (24–32 foot) rated for your weight plus 50 lbs of tools. Werner and Louisville Ladder remain the industry safety benchmarks. Look for Type I (250 lb) or Type IA (300 lb) ratings.
- Ladder stabilizers/standoffs — these keep the ladder away from gutters and provide a stable working position against siding
- Non-slip work boots with ankle support
- Safety glasses or goggles — especially when pressure washing or spraying overhead
- N95 respirator masks when sanding (old paint may contain lead if your home was built before 1978 — test before sanding) or when using oil-based products
- Nitrile gloves — protect skin from solvents, primers, and mildewcides
- Lead paint test kit — a $12–$20 investment that can save you from significant health and legal liability if your home predates 1978
Supply Comparison: DIY vs. Professional Grade
| Supply Category | DIY/Consumer Grade | Professional Grade | Performance Difference |
|---|---|---|---|
| Exterior Paint | $35–$55/gallon (Behr, Glidden) | $75–$100/gallon (SW Emerald, BM Aura) | Pro lasts 10–15 yrs vs. 5–7 yrs |
| Paintbrushes | $4–$8 (foam/basic nylon) | $18–$28 (Purdy, Wooster XL) | Minimal brush marks, far better cut-in precision |
| Caulk | $3–$5/tube (acrylic latex) | $10–$18/tube (elastomeric) | Elastomeric flexes; won’t crack in temperature swings |
| Primer | $25–$40/gallon (all-purpose) | $45–$70/gallon (oil-based, stain-block) | Professional primer prevents bleed-through and peeling |
| Painter’s Tape | $3–$5/roll (generic blue) | $9–$14/roll (3M Platinum, FrogTape) | Premium tape produces sharper, cleaner edges |
Which Exterior Paint Types Last Longest?
Based on industry data compiled through 2025–2026 from the Painting and Decorating Contractors of America (PDCA), here’s how major exterior paint types compare in average lifespan under typical conditions:
*Durability scores based on PDCA industry research, 2025–2026. Scores account for adhesion, color retention, moisture resistance, and flexibility.
3 Common Challenges and How to Overcome Them
Challenge 1: Painting in Non-Ideal Weather Conditions
Weather is the most uncontrollable variable in exterior painting. Most exterior paints require temperatures between 50°F and 90°F and relative humidity below 70% for proper curing. In 2026, with increasingly unpredictable weather patterns across North America, more painters are encountering edge-case conditions.
The solution: Monitor both temperature and humidity (not just temperature) using a dedicated weather app like Weather Underground that shows hourly humidity forecasts. Paint in the morning hours when dew point has passed and afternoon heat hasn’t peaked. Keep a digital thermometer and hygrometer on-site — they cost under $20 and take the guesswork out of go/no-go decisions.
Challenge 2: Dealing with Peeling or Failing Existing Paint
If your current paint is peeling extensively, painting over it is a temporary fix at best. The root cause is usually moisture intrusion, adhesion failure, or paint applied over an improperly prepared surface — and the new paint will fail in the same patterns.
The solution: For spot peeling (under 20% of surface area), scrape thoroughly, feather-sand the edges, spot-prime with an oil-based primer, and then topcoat. For widespread failure, consider chemical paint strippers (carefully — lead concerns apply to pre-1978 homes) or mechanical removal with a heat gun. In either case, identify and fix the moisture source before repainting. Supply additions here include: moisture meter (critical for diagnosing wood moisture content), heat gun with temperature control, and a wider supply of patching compound.
Challenge 3: Achieving Professional-Looking Trim and Cut Lines
Clean edges where the body color meets trim is the detail that separates a professional-looking job from an obvious DIY project. Most homeowners struggle with this because of tape selection and application technique.
The solution: Use FrogTape (green) rather than standard blue tape for surfaces where paint bleed is a concern — its PaintBlock technology actually seals the edge when it contacts wet latex paint. Apply tape to a clean, dry, dust-free surface and press the edge firmly with a putty knife rather than just your finger. Remove tape while the paint is still slightly wet (not fully dried) at a 45-degree angle. Invest in a Accubrush MX paint edger (about $28) for window and door frames — it produces remarkably clean lines with practice.
Frequently Asked Questions
How many gallons of paint do I need for my home’s exterior?
The general rule is one gallon of exterior paint covers approximately 350–400 square feet per coat over smooth surfaces. Calculate your paintable area by measuring the perimeter of your home, multiplying by wall height, then subtracting large windows and doors (roughly 20 sq ft each). Add 10–15% for waste and touch-ups. For a 1,800 sq ft home with standard 9-foot walls, expect to use 12–15 gallons per coat. Most exteriors need two finish coats plus one primer coat, so budget accordingly.
Do I really need to pressure wash before painting?
Yes — unequivocally. Paint bonds to the substrate, not to dirt, chalk, mildew, or old oxidized paint residue. Even surfaces that look clean harbor contaminants that destroy adhesion. A 2025 industry study by the PDCA found that improper surface cleaning was the leading cause of premature paint failure in residential exterior projects, accounting for 43% of warranty claims. Allow at least 48–72 hours of dry time after pressure washing before priming or painting.
What’s the most important single supply investment for a first-time exterior painter?
If forced to choose one, experienced painters overwhelmingly point to quality brushes — specifically a premium 4-inch angled sash brush for cutting in. Why? Because the cut-in work (where the paint meets the trim, windows, roofline, and corners) defines the visual quality of the entire job. A cheap brush creates streaks, leaves bristles in the paint, and causes uneven loading. The $22 difference between a budget brush and a Purdy Clearcut or Wooster Silver Tip translates directly into a noticeably better-looking finished project.
Your Exterior Paint Project Roadmap: Launch with Confidence
In 2026, painting your home’s exterior is one of the highest-ROI home improvement projects you can undertake — studies from the National Association of Realtors cite an average return of 51% on exterior paint investment at resale, and the protective benefits extend your home’s siding life significantly. But that return only materializes when the project is done right, and doing it right starts with what you gather before a single drop of paint is applied.
Here’s your immediate action checklist to launch with confidence:
- Inspect and diagnose first. Walk your entire exterior with a flashlight and probe (a screwdriver works). Note every crack, soft wood section, failing caulk joint, and mildew spot. This defines your supply list precisely rather than generically.
- Build your supply list by category. Use the sections above — surface prep, primer, paint, application tools, safety — and don’t skip categories to save upfront cost. Under-supplying is the most expensive mistake in exterior painting.
- Test your materials before you commit. Buy a quart of your chosen paint and test it on an inconspicuous section. See how it applies, how it dries, and how it looks in different light. Color matching to your mental picture takes trial and adjustment.
- Schedule strategically. Check 10-day forecasts and block your project window during a dry, moderate-temperature stretch. In most of the continental US, late spring and early fall remain the most reliable painting windows.
- Set up a staging area. Organize all supplies in one accessible location before day one. A chaotic supply area creates delay, accidents, and forgotten steps.
As smart home technology and exterior cladding materials continue evolving — with more homeowners in 2026 choosing fiber cement, engineered wood composites, and even hybrid cladding systems — the fundamentals of exterior paint preparation remain remarkably constant. Chemistry changes slowly; physics doesn’t. Clean, dry, sound surfaces bonded to high-quality primers and paints, applied with proper tools, will always outperform shortcuts.
So here’s the question worth sitting with before your first trip to the paint store: Are you investing in a paint job, or are you investing in your home’s protection for the next decade? The answer determines everything on your supply list — and ultimately, everything about the outcome.