Spray Painting Your House Exterior: Pros, Cons, and Expert Tips for 2026
Reading time: 14 minutes
You’ve stared at that peeling, faded exterior long enough. The question isn’t whether to repaint — it’s how. And right now, spray painting is having a serious moment. With labor costs rising and DIY home improvement searches hitting record highs in 2026, more homeowners than ever are picking up a spray gun instead of a roller. But is spray painting your house exterior the right move for you?
Here’s the honest truth: spray painting isn’t a magic shortcut. Done right, it delivers a flawless, professional finish in a fraction of the time. Done wrong, it’s an expensive, patchy mess that can damage surfaces, kill your landscaping, and send overspray drifting onto your neighbor’s car. This guide gives you the full picture — no sugarcoating, no oversimplifying.
Whether you’re a first-time DIYer or a seasoned home improver, this article will walk you through everything you need to make a smart, confident decision.
Table of Contents
- What Is Exterior Spray Painting?
- The Compelling Pros of Spray Painting
- The Real Cons You Need to Know
- Spray vs. Brush vs. Roller: Side-by-Side
- Cost Breakdown for 2026
- Real-World Case Studies
- Expert Tips for a Flawless Finish
- Preparation: The Step Most People Skip
- Frequently Asked Questions
- Your Spray Painting Roadmap: Next Steps
What Is Exterior Spray Painting?
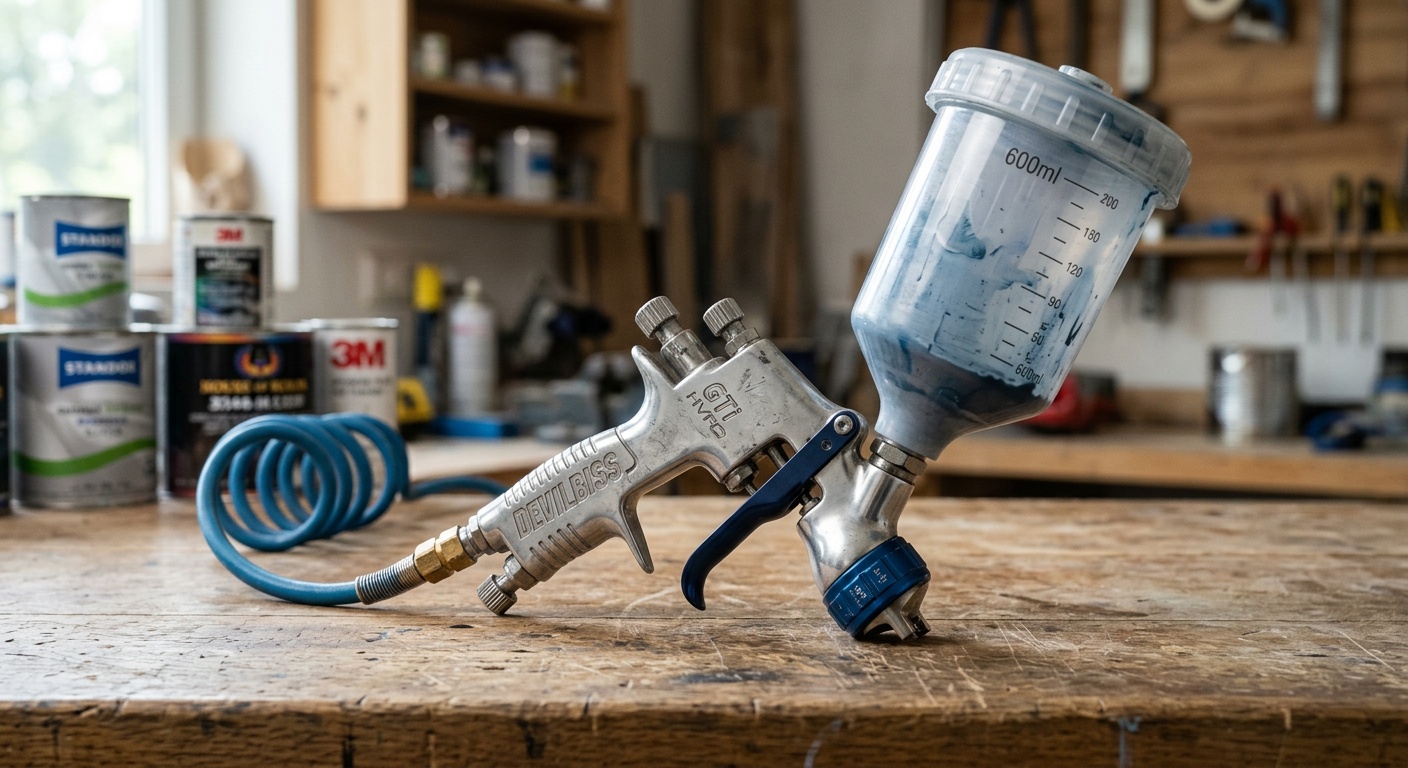
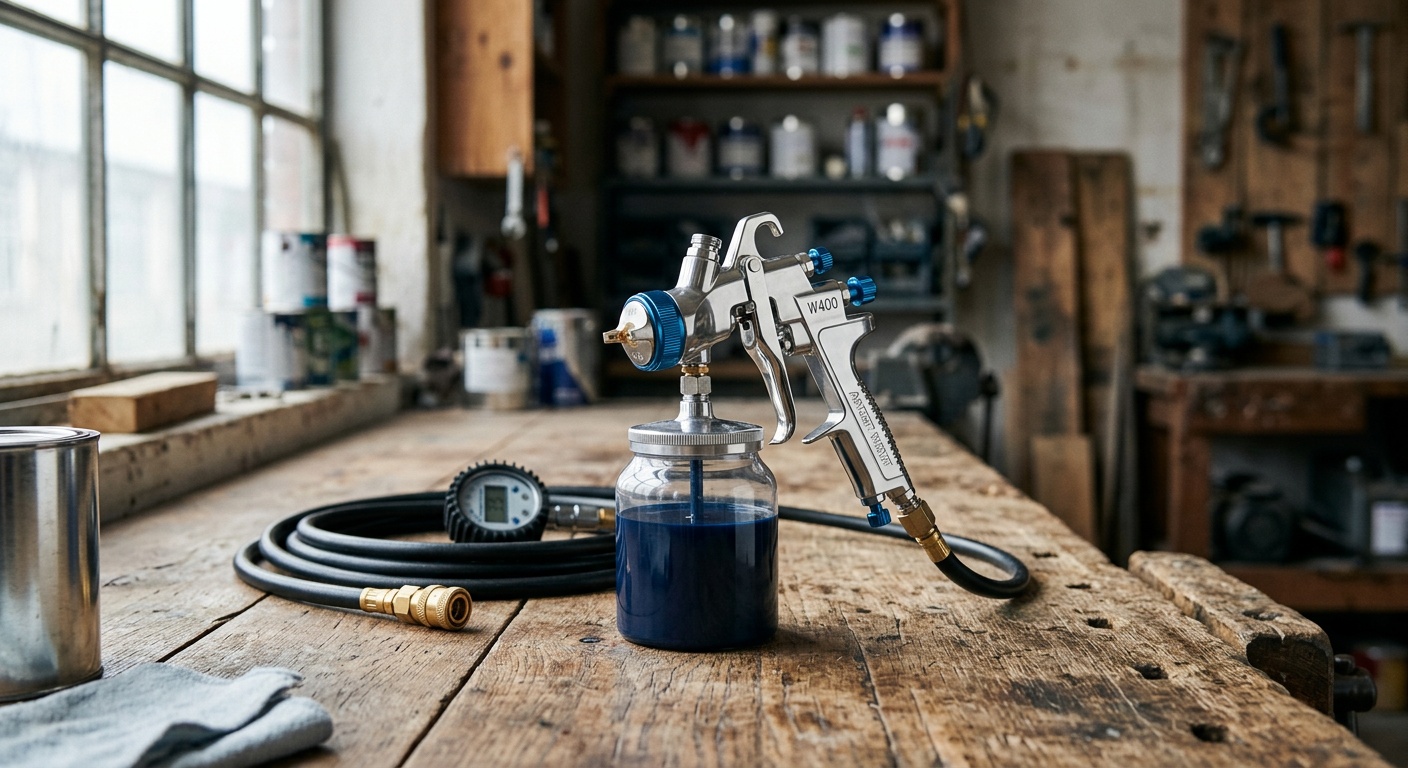
Exterior spray painting involves using an airless sprayer, HVLP (High Volume Low Pressure) sprayer, or compressed air system to atomize paint into fine droplets and apply them to your home’s outer surfaces. Unlike brushes or rollers that manually work paint into a surface, sprayers project paint at high velocity, creating an even, consistent coat across large surface areas.
In 2026, the technology has advanced considerably. Modern airless sprayers — like the Graco Magnum ProX series and Titan Impact 440 — feature digital pressure controls, anti-clog tips, and flexible hose lengths exceeding 100 feet, making it easier than ever to reach eaves, soffits, and second-story siding without constantly repositioning equipment.
The method works on virtually every exterior surface: wood siding, fiber cement (like HardiePlank), stucco, brick, vinyl siding, and even metal cladding. However, the technique, paint type, and preparation required vary significantly by surface — a distinction many guides gloss over.
The Compelling Pros of Spray Painting
Speed That’s Hard to Beat
This is the headline advantage, and it’s legitimate. A professional painter using a brush and roller might take 4–6 days to complete a 2,000 square foot home exterior. With an airless sprayer, that same job can be completed in 1–2 days. For DIYers, the time savings are equally dramatic — what might take three weekend-long sessions with a brush becomes a focused single weekend project with a sprayer.
According to a 2025 report by the Painting Contractors Association (PCA), spray application is approximately 3–4 times faster than brush-and-roll methods on open siding surfaces. That efficiency translates directly into lower labor costs when hiring professionals and less disruption to your household when doing it yourself.
Superior Finish Quality on Complex Surfaces
Ever tried rolling paint into the grooves of cedar shakes, the ridges of lap siding, or the intricate trim of a Victorian-style home? It’s tedious, time-consuming, and you almost never get full coverage on the back edges. A spray gun solves this elegantly. The atomized mist wraps around edges, penetrates grooves, and coats irregular surfaces that a roller simply can’t reach effectively.
For textured stucco exteriors in particular, spray application provides significantly more uniform coverage. Rollers can skip over texture peaks while loading up valleys with excess paint — spray application eliminates that problem entirely.
Consistent, Even Coverage
When properly calibrated and applied by a skilled operator, spray painting produces a smoother, more uniform finish than hand-application methods. There are no lap marks, no roller stippling texture, and no brush strokes. The result is a factory-smooth appearance that significantly enhances curb appeal — an increasingly important factor given that a 2026 Zillow Curb Appeal Study found that homes with freshly painted exteriors sell for an average of 3.7% more than comparable homes with dated or weathered paint.
Lower Labor Costs (Professionally Applied)
Because spray application is faster, professional painters who use this method often charge less in total labor hours. In major U.S. metro areas in 2026, professional exterior painting labor runs approximately $40–$80 per hour. Cutting three days of labor off a project is a meaningful saving — potentially $500–$1,500 on an average-sized home.
Excellent for New Construction and Bare Surfaces
If your home is under construction, being resided, or has never been painted, spray painting is almost the universally preferred method among professionals. When there’s nothing to mask or protect — no furniture, no established landscaping, no existing paint to protect — the prep time drops dramatically and the advantages multiply.
The Real Cons You Need to Know
Overspray: The Invisible Threat
This is spray painting’s biggest practical challenge, and it’s one that catches beginners completely off guard. Airless sprayers project paint at extremely high pressure — typically 1,500–3,300 PSI — which creates fine mist that travels far beyond your target surface. On a breezy day, overspray can drift 20–30 feet and land on cars, windows, patio furniture, plants, fences, and neighboring properties.
Overspray cleanup is expensive and sometimes impossible. Paint mist on a car’s finish can require professional detailing or even repainting. This isn’t a rare horror story — it’s a common outcome for inexperienced sprayers who underestimate wind conditions or skip masking. A thorough masking job (covering windows, doors, decking, plants, AC units) can add 4–8 hours to a project — nearly eliminating the time savings spray painting is supposed to deliver.
Steep Learning Curve for Beginners
Operating a sprayer looks deceptively simple on tutorial videos. In practice, maintaining consistent gun distance (typically 10–12 inches from the surface), managing spray pressure, keeping the gun moving at a steady pace, and overlapping passes correctly takes genuine practice. Beginners commonly produce runs, drips, thin spots, and uneven texture before they find their rhythm — often on the most visible sections of the house.
Paint Waste and Material Costs
Spray painting uses significantly more paint than brush or roller application. Industry estimates suggest spray application uses 20–40% more paint than roller application due to overspray loss and the thinner film build per pass. On a 2,000 square foot home requiring 10 gallons of paint at $50–$75 per gallon in 2026, that’s potentially $100–$300 in additional material costs compared to rolling — worth factoring into your budget.
Equipment Investment or Rental Costs
A quality airless sprayer for exterior work isn’t cheap. Entry-level DIY models (Graco Magnum X5, for example) run $300–$400. Professional-grade units can cost $800–$2,500+. Equipment rental from Home Depot or Sunbelt averages $60–$120 per day in 2026. For a one-time project, rental makes sense — but factor in the learning curve on rented equipment where time penalties can be costly.
Thorough Prep Is Non-Negotiable
Spray painting amplifies surface flaws rather than hiding them. Cracks, holes, peeling old paint, and dirty surfaces will be glaringly obvious under a fresh spray coat. The preparation required — power washing, scraping, sanding, caulking, priming — is essentially the same as with any other method. There are no shortcuts here.
Spray vs. Brush vs. Roller: Side-by-Side Comparison
| Factor | Spray | Brush | Roller |
|---|---|---|---|
| Application Speed | ⭐⭐⭐⭐⭐ Very Fast | ⭐⭐ Slow | ⭐⭐⭐ Moderate |
| Finish Quality (Flat Surfaces) | ⭐⭐⭐⭐⭐ Excellent | ⭐⭐⭐ Good | ⭐⭐⭐⭐ Very Good |
| Masking/Prep Required | Extensive | Minimal | Low-Moderate |
| Paint Efficiency | Lower (20–40% waste) | Highest | High |
| Best For | Large areas, complex textures | Trim, detail work | Flat siding, medium projects |
Pro Tip: Many professional painters use a hybrid approach — spraying the main field of siding, then back-rolling (lightly rolling over sprayed areas while wet) for better penetration and adhesion, and brushing trim details. This “spray-and-back-roll” technique is widely considered the gold standard in 2026.
Cost Breakdown for 2026
Let’s get specific. Here’s what you can realistically expect to spend on a 2,000 sq ft home exterior in 2026:
DIY Spray Painting
- Paint (10–14 gallons at $55–$75/gallon): $550–$1,050
- Primer (5–7 gallons at $35–$50/gallon): $175–$350
- Sprayer rental (2 days): $120–$240
- Masking materials, caulk, sandpaper: $80–$150
- Total DIY Estimate: $925–$1,790
Professional Spray Painting
- Labor (spray application, typically 2–3 days): $1,200–$2,500
- Paint and materials (contractor-supplied): $600–$1,200
- Total Professional Estimate: $1,800–$3,700
For context, the national average for professional exterior painting in 2026 — using any method — is approximately $3,200 for a single-story home and $4,800 for a two-story home, according to HomeAdvisor’s 2026 Cost Guide. Spray painting can reduce that by 15–25% depending on the contractor’s efficiency and your home’s complexity.
Spray Painting Cost Factors: Relative Impact
Key Cost Drivers (Relative Impact on Total Project Cost)
Real-World Case Studies
Case Study 1: The Ranch-Style DIY Success Story
Mark and Diana, homeowners in suburban Phoenix, tackled their 1,800 sq ft single-story stucco home in spring 2025. With stucco’s rough texture making rolling impractical, they rented a Graco Magnum ProX19 for $95/day and budgeted two weekends for the project.
Their first weekend was spent entirely on preparation: power washing, patching cracks with elastomeric caulk, and masking every window, door, and concrete surface with plastic sheeting and blue painter’s tape. They also covered their established desert landscaping with drop cloths. “The prep took almost as long as the painting,” Mark noted. “But it made the actual spraying so much smoother.”
By Sunday of their second weekend, they had applied a full coat of primer and two finish coats of Sherwin-Williams Emerald Exterior in a warm terracotta. Total cost: $1,340. A quote from a local painting contractor had come in at $4,200. They saved nearly $2,900 — though Mark admits they logged approximately 32 hours of combined labor. Verdict: Highly successful, but physically demanding and time-intensive.
Case Study 2: The Multi-Story Victorian Cautionary Tale
In contrast, Jennifer attempted to spray paint her three-story Victorian in Portland, Oregon in fall 2025 without professional help. The home had intricate gingerbread trim, multiple paint colors, and extensive window placement. After an unexpectedly windy afternoon session, overspray drifted onto her neighbor’s recently detailed car and covered her own porch deck.
The car repainting claim cost $1,400. The deck required sanding and recoating. Her total project, which she estimated would cost $1,500, ended up costing over $4,200 when remediation was factored in. The lesson? Complex, multi-story homes with intricate architecture are not ideal DIY spray projects — the risk-reward calculation simply doesn’t work in the amateur’s favor.
Expert Tips for a Flawless Exterior Spray Finish
Choose the Right Equipment for Your Surface
Not all sprayers are equal. For exterior work on wood or fiber cement siding, an airless sprayer with a .017–.021 tip size is ideal. For smoother surfaces like previously painted vinyl, a finer .013–.015 tip reduces overspray. HVLP sprayers are better suited to finish work and trim — they’re too slow for whole-house coverage.
Always Spray in Optimal Conditions
Wind is your enemy. Never spray if winds exceed 10 mph — check your local weather app for hourly forecasts, not just daily summaries. Temperature matters too: most exterior paints require ambient temperatures of 50–90°F and surfaces should be out of direct sunlight when applying to prevent flash-drying. Early morning (7–10 AM) is typically the spray painter’s sweet spot.
Master the Spray Technique Before You Touch the House
Practice on cardboard or scrap wood first. Maintain a consistent 10–12 inch distance from the surface. Keep the gun perpendicular to the wall — tilting creates uneven coverage. Move your arm in smooth, parallel passes, overlapping each stroke by 50%. Start and stop each stroke before you trigger and after you release — never trigger at a standstill or you’ll get a heavy blob of paint.
Thin Your Paint Appropriately
Check your sprayer’s manual and paint manufacturer recommendations. Most exterior latex paints benefit from 10–15% thinning with water for spray application — this reduces tip clogs, improves atomization, and creates a smoother finish. Always strain paint through a mesh filter before loading it into your sprayer to remove any dried particles that can clog the tip mid-job.
Use High-Quality Exterior Paint
In 2026, don’t cut corners on paint quality. The premium paint market has expanded significantly — products like Sherwin-Williams Emerald Exterior, Benjamin Moore Aura Exterior, and PPG Diamond Exterior are specifically formulated for exceptional adhesion, UV resistance, and flexibility through temperature swings. In climates with freeze-thaw cycles, flexibility is critical — cheap paint cracks; quality paint moves with your siding.
Preparation: The Step Most People Skip (Or Rush)
Here’s the truth that no equipment salesperson wants to emphasize: 80% of a quality paint job is preparation. Spray painting makes this even more critical, because the thin, even coat it applies will faithfully reproduce every surface defect beneath it.
Your complete prep checklist should include:
- Power washing: Rent or buy a pressure washer (1,500–2,000 PSI for most siding) and wash the entire exterior. Allow a full 24–48 hours of drying time before painting.
- Scraping and sanding: Remove all loose or peeling paint. Sand rough edges to a smooth feather. Any old paint that isn’t firmly adhered will cause your new coat to fail.
- Caulking: Re-caulk all gaps around windows, doors, trim joints, and where siding meets masonry. Use a paintable exterior caulk that’s rated for your climate range.
- Priming: Bare wood, repaired areas, and highly porous surfaces (stucco, old brick) require primer. Don’t skip this — primer dramatically improves adhesion and extends the life of your finish coat.
- Masking: Cover everything you don’t want painted. Use professional-grade painter’s tape rated for exterior use (regular tape can lift in heat or humidity). Plastic sheeting secured with tape protects windows, doors, lights, and landscaping.
Quick Scenario: Imagine you discover your home has 3-4 layers of old oil-based paint on cedar siding. Should you spray a fresh latex coat on top? Absolutely not without proper testing and preparation. Old oil paint can be incompatible with modern latex, causing peeling within months. In older homes (pre-1978), old paint may contain lead — always test with an EPA-approved lead test kit before sanding or scraping anything, and follow EPA RRP (Renovation, Repair and Painting) guidelines if lead is detected.
Frequently Asked Questions
Is spray painting a house exterior better than using a roller?
It depends entirely on your home’s complexity, your skill level, and your priorities. Spray painting is significantly faster and produces superior results on textured or complex surfaces like stucco, cedar shakes, or ornate trim. However, it requires far more preparation and masking, consumes more paint, and carries greater risk for beginners. Many professionals in 2026 recommend a spray-and-back-roll hybrid approach for most residential exteriors, combining the speed of spray application with the adhesion benefits of rolling. For simple, flat vinyl siding on a small home, a high-nap roller can be just as effective and far less risky for DIYers.
How long does spray-painted exterior paint last compared to brush-applied paint?
When properly applied with quality paint, spray-painted and brush-applied exterior paint perform similarly in terms of longevity — typically 7–12 years depending on climate, paint quality, and surface type. The critical variable is film thickness: spray application tends to produce thinner individual coats, meaning you may need three coats where two would suffice with a brush to achieve equivalent durability. The back-rolling technique helps address this by working the paint into the surface for better adhesion. Climate is a major factor — homes in harsh UV environments (Arizona, Florida) or extreme freeze-thaw zones (Minnesota, Michigan) will see paint life on the shorter end regardless of application method.
Do I need a permit to spray paint my house exterior?
In most U.S. jurisdictions, exterior repainting doesn’t require a permit — it’s considered routine maintenance rather than a structural change. However, several important exceptions apply in 2026. If your home is in a Historic District, you may need approval for color changes or surface preparation methods. Some HOA communities require color pre-approval. If your home was built before 1978 and you’re disturbing existing painted surfaces, EPA RRP lead-safe work practice rules apply if you’re a contractor (not strictly for homeowners working on their own property, but strongly recommended for safety). Always check your local municipality’s building department and your HOA guidelines before starting any significant exterior work.
Your Spray Painting Roadmap: Next Steps
You now have the full picture — not the glossy sales pitch, but the real-world guide that helps you make a genuinely informed decision. Here’s your action-oriented roadmap for moving forward with confidence:
- Assess your home’s suitability: Is it a simple ranch or a complex Victorian? Single story or multi-story? Smooth vinyl or textured stucco? The more complex your home, the more strongly you should consider hiring a professional spray painter rather than DIYing.
- Get your prep plan in place first: Before you rent a sprayer or buy paint, walk the entire exterior and document every crack, peeling area, and surface irregularity. Budget time and materials for thorough prep — it’s the foundation of everything.
- Source quality paint and get the right tip: Visit a dedicated paint store (not just a big-box hardware store) and speak with a specialist about the right product for your surface type and climate. They’ll also advise on the correct tip size for spray application.
- Do a test run: Rent the sprayer for one day before your main painting weekend. Practice on scrap material, get comfortable with pressure settings and gun movement, and identify any issues with your equipment before you’re committed mid-project.
- Plan your weather window carefully: Check the 5-day forecast and schedule your painting days for low wind, moderate temperatures, and no rain for at least 48 hours post-application.
As sustainable building practices continue to evolve in 2026 and beyond, exterior coatings are becoming smarter — with self-cleaning formulations, cool-roof pigments that reduce AC costs, and low-VOC options that protect both your family and the environment. The decision you make about how you apply paint is just as important as what paint you choose in this new era of home stewardship.
Here’s the question worth sitting with: Is the time and money you’d save with spray painting worth the learning curve and risk for your specific home — or would the peace of mind from professional application be the smarter long-term investment? Only you can answer that, but now you have the tools to answer it well. Your home is likely your most valuable asset. Paint it like it matters.