DIY Exterior House Painting Tips for a Flawless Finish
Reading time: 14 minutes
Ever stared at your home’s peeling, faded exterior and thought, “I could fix that myself”? You’re not alone — and you’re probably right. DIY exterior painting has surged in popularity, with a 2025 HomeAdvisor survey reporting that 62% of homeowners who tackled exterior painting projects themselves saved an average of $3,800 compared to hiring professionals. But here’s the straight talk: a flawless exterior finish isn’t about slapping paint on a wall. It’s about strategic preparation, the right materials, and disciplined technique.
Whether your Victorian bungalow needs a fresh identity or your stucco ranch house is crying out for a color refresh, this guide walks you through every phase — from surface prep to final coat — with the precision and clarity you need to get it right the first time.
Table of Contents
- Why DIY Exterior Painting Makes Sense in 2026
- Surface Preparation: The Foundation of Everything
- Choosing the Right Tools and Paint
- Application Techniques for a Pro-Level Finish
- Common Challenges and How to Overcome Them
- Real-World Examples: What Works
- Paint Type Performance Comparison
- Frequently Asked Questions
- Your Exterior Painting Action Plan: Final Steps
Why DIY Exterior Painting Makes Sense in 2026
The home improvement market in 2026 looks markedly different from five years ago. Labor costs for professional painting crews have increased by approximately 28% since 2022, according to the Bureau of Labor Statistics. A professional exterior paint job on a 2,000 sq. ft. home now averages between $5,500 and $9,200 depending on your region, surface complexity, and paint grade chosen.
Meanwhile, the quality of consumer-grade exterior paints has improved dramatically. Brands like Sherwin-Williams Emerald Exterior, Benjamin Moore Aura, and Behr Marquee — all now available with advanced ceramic microsphere formulations — offer durability ratings once reserved for commercial applications. In 2025, Sherwin-Williams updated its Emerald line with enhanced UV-blocking polymers that extend repainting intervals to 10–15 years under normal conditions.
The DIY opportunity is real — but it rewards those who respect the process. Let’s dive in.
Surface Preparation: The Foundation of Everything
Ask any professional painter what separates a five-year paint job from a fifteen-year one, and they’ll say the same thing: preparation. It accounts for roughly 70% of the outcome but only gets about 30% of the attention from first-time DIYers. That imbalance is the single biggest source of DIY painting failures.
Step 1: Inspect, Identify, and Repair
Before you open a single can of paint, walk the full perimeter of your home with a critical eye. You’re looking for:
- Peeling or bubbling paint — a sign of moisture intrusion or adhesion failure
- Cracks and gaps in wood, caulk joints, or masonry
- Rot or soft wood on trim, sills, and siding boards
- Efflorescence (white mineral deposits) on brick or stucco
- Mold or mildew stains — especially in shaded, north-facing areas
Replacing rotted wood before painting isn’t optional — it’s essential. Painting over damaged surfaces doesn’t protect them; it hides the problem temporarily while it worsens underneath. Use a quality exterior wood filler like Minwax High-Performance Wood Filler for minor damage, and replace boards entirely for anything soft or structurally compromised.
Step 2: Clean the Surface Thoroughly
Clean surfaces are non-negotiable. Dirt, grease, chalky residue, and biological growth (mold/mildew) all prevent proper paint adhesion.
Power washing is the most efficient approach. Use a pressure washer set between 1,500–2,500 PSI. Higher pressure risks damaging wood siding, so stay conservative. For mold or mildew, pre-treat with a diluted bleach solution (1 part bleach to 4 parts water) and let it dwell for 10 minutes before rinsing. In 2026, oxygen-based cleaners like OxiClean Outdoor have become a popular eco-friendly alternative, particularly in states with stricter runoff regulations.
Pro Tip: Allow a full 48–72 hours of drying time after washing before applying any primer or paint. Moisture trapped under paint is the #1 cause of premature peeling. If you’re in a humid climate, consider extending this to 96 hours or using a moisture meter to confirm surface readings below 15%.
Step 3: Scrape, Sand, and Caulk
Once dry, scrape all loose and peeling paint using a quality paint scraper. Follow up with 80-grit sandpaper to feather the edges of scraped areas so transitions are smooth. For large surfaces, a random orbital sander speeds things up considerably.
Next, re-caulk every joint, gap, and seam. Use a paintable elastomeric caulk — not silicone, which rejects paint adhesion. Apply it to:
- Window and door frames where trim meets siding
- Corners where two siding panels meet
- Any gap larger than 1/8 inch along trim lines
- Around exterior light fixtures, outlets, and vents
Allow caulk to cure according to manufacturer directions (typically 24 hours) before priming.
Choosing the Right Tools and Paint
Your tools and paint selection will directly determine how your project looks and how long it lasts. Here’s where smart investment pays dividends.
Selecting Your Paint: More Than Just Color
Exterior paint is an engineered product, and every formulation makes tradeoffs. In 2026, the market has largely converged on 100% acrylic latex as the standard for most exterior applications. It offers superior flexibility (resisting cracking as surfaces expand and contract), excellent adhesion, UV resistance, and easy cleanup with water.
Within that category, sheen level matters significantly:
- Flat/Matte — best for hiding surface imperfections on older siding; less washable
- Satin — the sweet spot for most exterior walls; slight sheen, good durability, easier to clean
- Semi-gloss — ideal for trim, doors, and shutters; highlights architectural details, highly washable
- Gloss — reserved for specific accent elements; amplifies imperfections on large surfaces
For homes in direct coastal environments, look for paints with mildewcide additives and anti-corrosive formulations. Sherwin-Williams Duration and Benjamin Moore Aura both offer regional-climate-specific formulas worth exploring at your local paint counter.
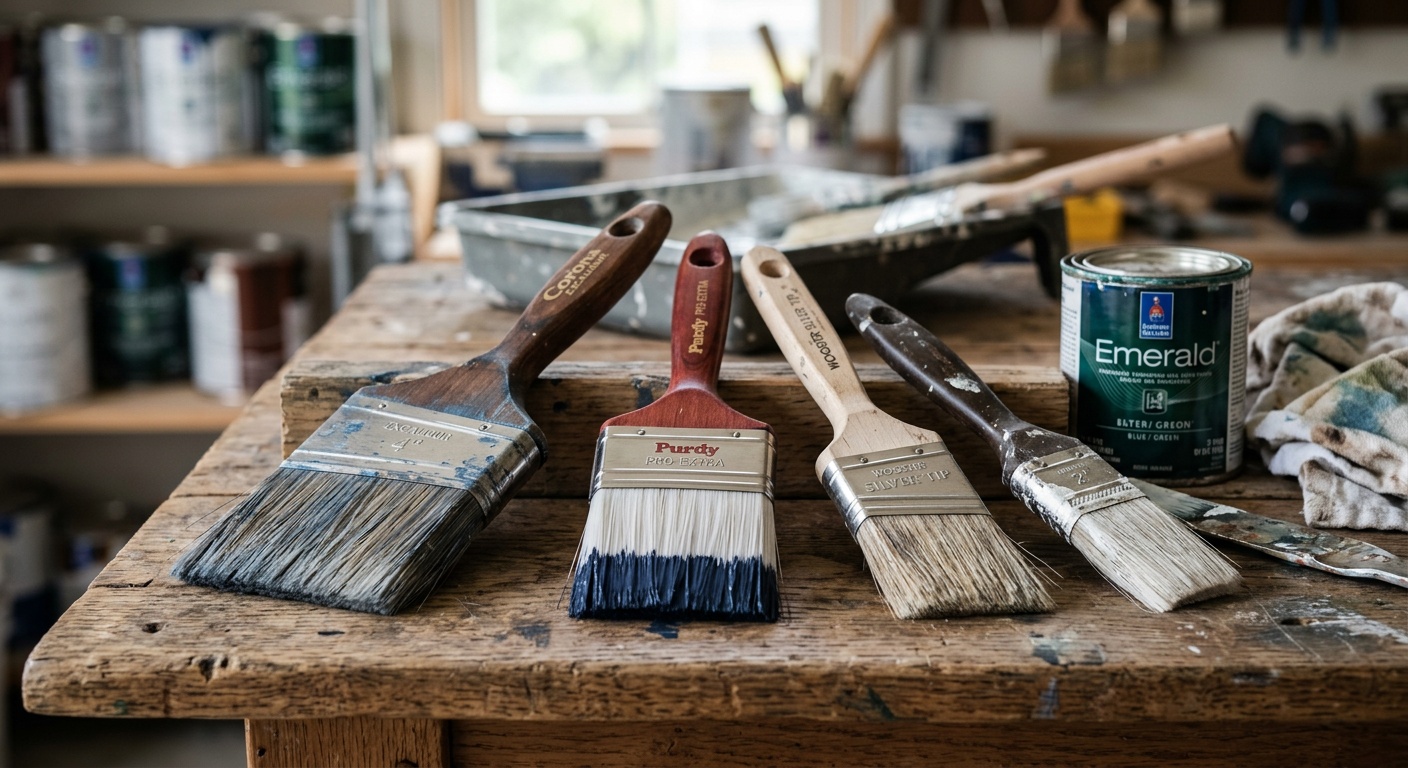
Tools That Make the Difference
Don’t underestimate tool quality. A cheap brush leaves stroke marks and sheds bristles; a cheap roller creates an uneven texture that’s nearly impossible to fix once dry.
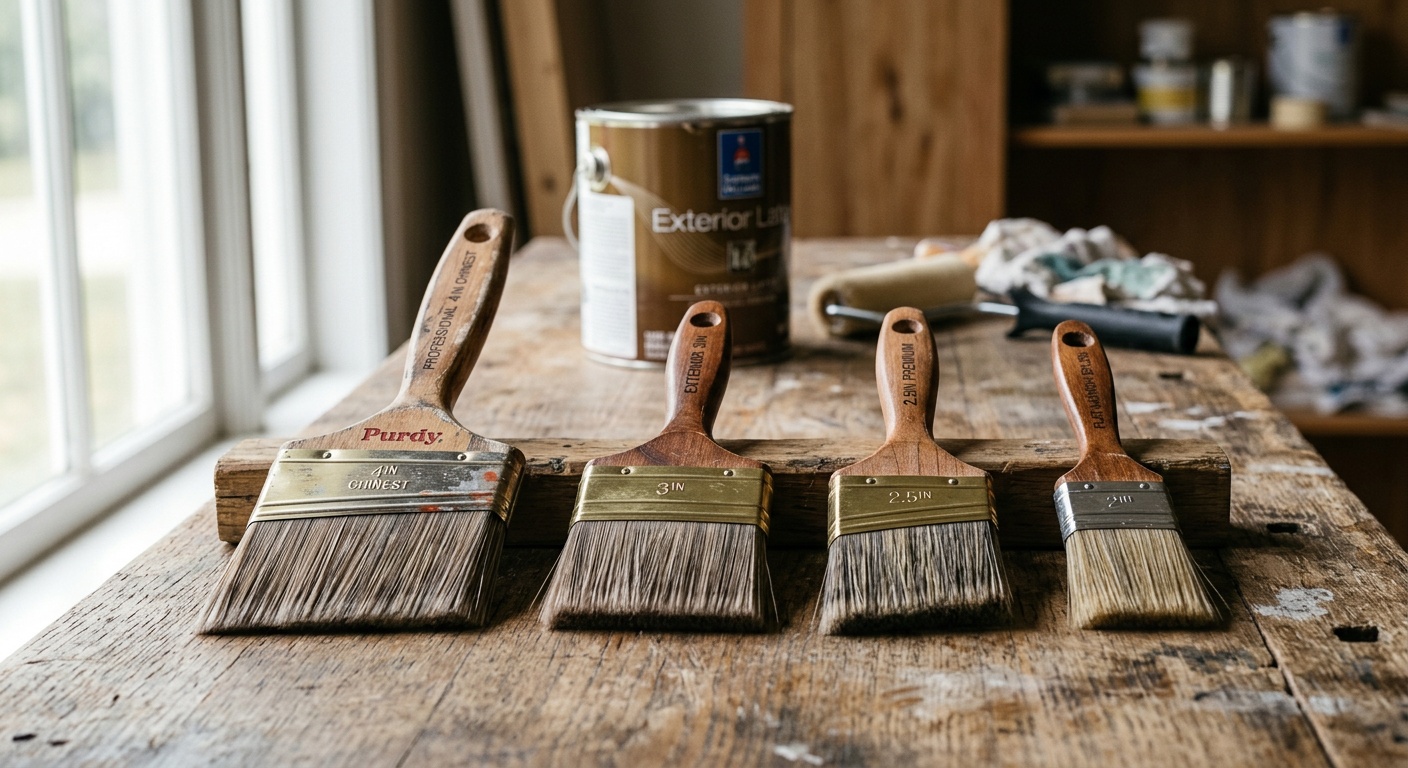
- Brushes: Use nylon-polyester blend brushes with latex paint. A 3-inch angled sash brush handles most trim work; a 4-inch flat brush covers flat siding efficiently.
- Rollers: 9-inch rollers with a 3/8-inch nap work for smooth to lightly textured siding. Increase to 1/2-inch nap for rougher surfaces.
- Airless paint sprayer: For projects over 1,500 sq. ft., renting an airless sprayer (around $60–$100/day in 2026) dramatically accelerates application and creates a smooth, factory-like finish. However, masking and overspray management require significant extra effort.
- Extension poles: A 4–8 ft. extension pole for your roller is essential for working safely from the ground on first-story walls.
- Drop cloths and masking tape: Canvas drop cloths are reusable and worth the investment. Use 3M ScotchBlue Painter’s Tape for clean lines on trim and windows.
Application Techniques for a Pro-Level Finish
Great preparation sets the stage; great technique delivers the performance. Follow this sequence carefully.
Always Prime Before You Paint
Skipping primer is one of the most costly shortcuts a DIYer can take. Primer serves three critical functions: it seals the surface, improves adhesion, and ensures color uniformity. Use a dedicated exterior primer — not a paint-and-primer-in-one product for surfaces that have been stripped, repaired, or have significant color changes.
For bare wood, use an oil-based primer for maximum penetration and stain blocking. For previously painted surfaces in good condition, a quality acrylic latex primer is sufficient and easier to apply. For masonry, use an alkaline-resistant masonry primer to neutralize pH and prevent efflorescence from bleeding through.
The Right Painting Sequence
Paint from top to bottom, working with natural light at your back. This sequence minimizes drips landing on finished work:
- Eaves, fascia boards, and soffits first
- Upper walls, working in 3–4 ft. horizontal sections
- Lower walls
- Doors, windows, and detailed trim last
When brushing, use long, smooth strokes in the direction of the grain (for wood) or the length of the board. Never overwork wet paint — brush marks made in partially dry paint are very difficult to eliminate. Apply at a comfortable pace and let the paint flow naturally.
For rolling, use a W or N pattern: roll in one direction to distribute the paint, then roll perpendicular to even it out without lifting the roller. This technique, borrowed from professional applicators, eliminates edge lines and creates uniform coverage.
Temperature and Weather: Non-Negotiable Conditions
Exterior paint application is highly weather-sensitive. Follow these guardrails absolutely:
- Apply paint only when temperatures are between 50°F and 90°F (10°C–32°C) and stable for at least 4 hours before and after application
- Avoid painting in direct, intense sunlight — especially on dark surfaces — as it causes paint to dry too fast, reducing leveling time and trapping bubbles
- Never paint on surfaces wet with dew or before dew-point conditions in the evening
- Check wind speeds: above 15 mph increases dust contamination and dries edges too quickly when spraying
- Never paint when rain is forecast within 24 hours
In 2026, many paint brands now offer extended-temperature-range formulas that allow application down to 35°F, useful for late-season projects in northern climates — but always verify with the specific product datasheet.
Common Challenges and How to Overcome Them
Even well-prepared DIYers encounter obstacles. Here are the three most common exterior painting challenges and practical solutions.
Challenge 1: Paint Peeling After Just One Season
This is heartbreaking — and entirely preventable. Premature peeling almost always traces back to one of three causes: moisture in the substrate at application, insufficient surface preparation, or skipping primer. If you experience this, don’t just repaint over peeling paint. Strip back to a solid layer, address any moisture source (check gutters, flashing, and caulk joints), prime properly, and repaint. A moisture meter (available for under $30) is an invaluable diagnostic tool.
Challenge 2: Lap Marks and Uneven Coverage
Lap marks — those darker stripes where wet paint overlaps dried paint — are a classic sign of working too slowly or in sections that are too large. The fix: always maintain a wet edge. Work in manageable sections (no wider than 4–5 feet) and complete each section before the edge begins to dry. Adding a paint conditioner like Floetrol to your latex paint extends open time, giving you more working time to blend edges seamlessly.
Challenge 3: Drips and Runs on Trim and Doors
Drips happen when too much paint is loaded on the brush or roller, particularly on vertical surfaces. The solution is disciplined paint loading: dip your brush no more than one-third of the bristle length, tap (don’t wipe) the excess on the inside of the can, and apply with controlled, even pressure. For doors and trim, a high-density foam roller can deliver smoother results than a brush, particularly on flat-panel surfaces.
Real-World Examples: What Works
Case Study 1 — The Portland Ranch Refresh (2025): Homeowner Marcus T. tackled a complete exterior repaint on his 1,650 sq. ft. ranch-style home in Portland, Oregon. The house featured original cedar lap siding that hadn’t been painted in 11 years. Marcus invested three weekends in preparation — power washing, spot-treating mold with a bleach solution, replacing six damaged siding boards, and applying an oil-based primer to all bare wood. He chose Sherwin-Williams Emerald Exterior in a satin finish and applied two coats. Total material cost: $780. Contractor quotes had ranged from $6,200 to $7,800. Two years later, the finish remains intact with no peeling or fading. His one key lesson: “I almost skipped the second coat to save time. That would have been a disaster. The second coat is what gives you the durability.”
Case Study 2 — The Atlanta Stucco Challenge (2026): Homeowner Priya S. faced a trickier challenge: repainting a 2,400 sq. ft. stucco home in Georgia’s humid summer climate. Stucco is porous, alkaline, and prone to absorbing moisture — a combination that chews through paint adhesion. Priya used an elastomeric masonry primer followed by two coats of Benjamin Moore Aura Exterior in a flat finish. The elastomeric formulation’s flexibility proved critical — Atlanta’s temperature swings between summer and winter cause significant stucco expansion. Priya also used a 3/4-inch nap roller to ensure full penetration into the textured surface. Her total investment: $1,100 in materials plus about 60 hours of labor over four weekends. A professional quote had come in at $11,500.
Paint Type Performance Comparison
Comparative Table: Exterior Paint Options at a Glance
| Paint Type | Avg. Durability | Best Surface | Avg. Cost/Gallon (2026) | Eco-Friendliness |
|---|---|---|---|---|
| 100% Acrylic Latex (Premium) | 10–15 years | Wood, fiber cement | $65–$95 | High (low VOC) |
| Elastomeric Masonry | 10–20 years | Stucco, concrete block | $70–$110 | Medium |
| Oil-Based Alkyd | 6–10 years | Metal, trim, bare wood | $50–$80 | Low (high VOC) |
| Paint + Primer in One | 5–8 years | Previously painted surfaces | $45–$75 | Medium-High |
| Solid Color Stain (Wood) | 4–7 years | Rough-sawn wood, decks | $40–$65 | Medium-High |
DIY vs. Professional: Where Your Money Goes
Estimates based on a 2,000 sq. ft. single-story home, 2026 national averages.
Frequently Asked Questions
How many coats of paint does an exterior house need?
Most exterior painting projects require two coats of topcoat paint over a properly applied primer. One coat is rarely sufficient to achieve full coverage, hide the previous color, and build the film thickness needed for long-term durability. In some cases — such as painting a light color over a very dark existing color, or covering highly porous surfaces — a third coat may be warranted. Always allow the first coat to fully dry (typically 4–6 hours for acrylic latex, but check manufacturer specs) before applying the second. Rushing between coats is one of the most common DIY mistakes and leads to poor adhesion, bubbling, and uneven sheen.
Can I paint my house’s exterior in the summer heat?
You can, but you need to be strategic. High temperatures (above 90°F) cause latex paint to dry too quickly, reducing its ability to self-level and increasing the risk of lap marks, bubbling, and brush marks. In hot climates, plan to paint the north and east sides of your home in the morning, and shift to west and south-facing walls in the late afternoon when direct sunlight has moved on. Avoid painting any surface that’s in direct, intense sunlight at that moment — touch the surface; if it’s hot to the touch, wait. Some premium formulas like Sherwin-Williams Emerald and Benjamin Moore Aura have improved hot-weather application windows, but no paint performs optimally above 95°F.
Do I need to prime over existing paint that’s still in good condition?
If the existing paint is firmly adhered, clean, and in good condition with no significant color change planned, you can often apply a fresh topcoat directly — provided you lightly sand the surface for adhesion and clean it thoroughly. However, if you’re switching from oil-based to latex paint, changing to a dramatically different color, painting over stained wood, or dealing with any areas of bare substrate exposed by scraping, primer is essential. A spot-priming approach — priming only the repaired and bare areas before the full topcoat — is an acceptable middle ground for repaints where most of the surface is sound. When in doubt, prime the whole surface: the cost of a gallon of primer is trivial compared to redoing the entire job.
Your Exterior Painting Action Plan: Brush Off Hesitation and Start Smart
The gap between a paint job that peels in two years and one that looks stunning for a decade isn’t talent — it’s process. And now you have the process. Here’s your distilled action plan for moving from intent to flawless finish:
- ✅ Week 1 — Diagnose and Plan: Walk your home’s exterior, document every area of damage, moisture intrusion, or failed paint. Get your supply list finalized. Choose your color using large sample swatches applied to actual walls, viewed in different lighting conditions.
- ✅ Weekend 1 — Prep Aggressively: Power wash, treat mold, replace rotted wood, scrape, sand, and caulk all gaps. This is your most important investment of time. Don’t rush it.
- ✅ Weekend 2 — Prime Everything That Needs It: Apply primer to all bare, repaired, and high-risk surfaces. Spot-prime at minimum; full prime for the best results. Allow full cure time.
- ✅ Weekend 3 — First Topcoat: Start with soffits and fascia, move to walls top-to-bottom, save trim for last. Maintain a wet edge throughout. Check weather forecasts obsessively.
- ✅ Weekend 4 — Second Topcoat and Detail Work: Apply the second coat, revisit any thin or missed areas, touch up trim, doors, and shutters. Step back and admire your work.
The broader trend here is worth noting: in 2026, homeowners are increasingly reclaiming skilled trades as quality DIY resources, better materials, and online guidance make professional-level outcomes accessible to motivated individuals. Exterior painting is one of the highest-ROI home improvement projects you can undertake — studies show it consistently delivers 50–150% return on investment in home resale value, according to Remodeling Magazine’s 2025 Cost vs. Value Report.
You now have everything you need to approach this project with confidence. The question isn’t whether you can do it — it’s whether you’re ready to respect the process enough to do it right. So: which wall are you starting on this weekend?